VSzA techblog

Using TOR to evade Play Store geoban

2013-06-13

At Silent Signal, we use Amazon Web Services for various purposes (no, we don't run code that handles sensitive information or store such material without end-to-end encryption in the cloud), and when I read that multi factor authentication is available for console login, I wanted to try it. Amazon even had an app called AWS virtual MFA in the Play Store and in their appstore, but I couldn't find them on my Nexus S, so I tried a different approach by opening a direct link. The following message confirmed that I couldn't find it beacuse someone found it a good idea to geoban this application, so it wasn't available in Hungary.

Geoban in Play Store on AWS virtual MFA

Although a month ago I found a way to use Burp with the Android emulator, but this time, I didn't want to do a man-in-the-middle attack, but rather just redirect all traffic through an Internet connection in a country outside the geoban. I chose the United States, and configured TOR to select an exit node operating there by appending the following two lines to torrc.

ExitNodes {us}
StrictExitNodes 1

TOR was listening on port 9050 as a SOCKS proxy, but Android needs an HTTP one, so I installed Privoxy using apt-get install privoxy, and just uncommented a line in the Debian default configuration file /etc/privoxy/config that enabled TOR as an upstream proxy.

forward-socks5   /               127.0.0.1:9050 .

For some reason, the Android emulator didn't like setting Privoxy as the HTTP proxy – HTTP connections worked, but in case of HTTPS ones, the emulator just closed the connection with a FIN just after receiving the SSL Server Hello packet, as it can be seen below in the output of Wireshark.

Android emulator sending a FIN right after SSL Server Hello

Even disconnecting TOR from Privoxy didn't help, so after 30 minutes of trials, I found another way to set a proxy in the Android emulator – or any device for that matter. The six steps are illustrated on the screenshots below, and the essence is that the emulator presents the network as an Access Point, and such APs can have a proxy associated with them. The QEMU NAT used by the Android emulator makes the host OS accessible on 10.0.2.2, so setting this up with the default Privoxy port 8118 worked for the first try.

Setting up an Access Point proxy in Android

I installed Play Store by following a Stack Overflow answer, and as it can be seen below, it appeared in the search results and I was able to install it – although the process was pretty slow, and some images are missing from the screenshots below because the latency of TOR was so high that I didn't wait for them to be loaded.

Installing AWS virtual MFA from Play Store over TOR

Having the app installed on the emulator, it's trivial to get the APK file that can be installed on any device now, even those without network connection.

$ adb pull /data/app/com.amazonaws.mobile.apps.Authenticator-1.apk .
837 KB/s (111962 bytes in 0.130s)
$ file com.amazonaws.mobile.apps.Authenticator-1.apk
com.amazonaws.mobile.apps.Authenticator-1.apk: Zip archive data, at least v2.0 to extract
$ ls -l com.amazonaws.mobile.apps.Authenticator-1.apk
-rw-r--r-- 1 dnet dnet 111962 jún   13 14:49 com.amazonaws.mobile.apps.Authenticator-1.apk

F33dme vs. Django 1.4 HOWTO

2013-05-31

Although asciimoo unofficially abandoned it for potion, I've been using f33dme with slight modifications as a feed reader since May 2011. On 4th May 2013, Debian released Wheezy, so when I upgraded the server I ran my f33dme instance on, I got Django 1.4 along with it. As with major upgrades, nothing worked after the upgrade, so I had to tweak the code to make it work with the new release of the framework.

First of all, the database configuration in settings.py were just simple key-value pairs like DATABASE_ENGINE = 'sqlite3', these had to be replaced with a more structured block like the one below.

DATABASES = {
    'default': {
        'ENGINE': 'sqlite3',
        ...
    }
}

Then starting the service using manage.py displayed the following error message.

Error: One or more models did not validate:
admin.logentry: 'user' has a relation with model
    <class 'django.contrib.auth.models.User'>, which
    has either not been installed or is abstract.

Abdul Rafi wrote on Stack Overflow that such issues could be solved by adding django.contrib.auth to INSTALLED_APPS, and in case of f33dme, it was already there, I just had to uncomment it. After this modification, manage.py started without problems, but rendering the page resulted in the error message below.

ImproperlyConfigured: Error importing template source loader
    django.template.loaders.filesystem.load_template_source: "'module'
    object has no attribute 'load_template_source'"

Searching the web for the text above led me to another Stack Overflow question, and correcting the template loaders section in settings.py solved the issue. Although it's not a strictly Django-related problem, but another component called feedparser also got upgraded and started returning such values that resulted in TypeError exceptions, so the handler in fetch.py also had to be extended to deal with such cases.

With the modifications described above, f33dme now works like a charm, although deprecation warnings still get written to the logs both from Django and feedparser, but these can be dealt with till the next Debian upgrade, and until then, I have a working feed reader.


LibreOffice 4.0 workaround for read-only FS

2013-02-10

LibreOffice 4.0 got released on 7th February, and since it offered improved OOXML interoperability, I immediately downloaded and installed it on my laptop. It worked quite well, but after the next boot, it just flashed the window for a tenth of a second, and displayed the following output on the console.

Fatal Python error: Py_Initialize: Unable to get the locale encoding
Traceback (most recent call last):
  File "<frozen importlib._bootstrap>", line 1558, in _find_and_load
  File "<frozen importlib._bootstrap>", line 1525, in _find_and_load_unlocked
  File "<frozen importlib._bootstrap>", line 586, in _check_name_wrapper
  File "<frozen importlib._bootstrap>", line 1023, in load_module
  File "<frozen importlib._bootstrap>", line 1004, in load_module
  File "<frozen importlib._bootstrap>", line 562, in module_for_loader_wrapper
  File "<frozen importlib._bootstrap>", line 854, in _load_module
  File "<frozen importlib._bootstrap>", line 990, in get_code
  File "<frozen importlib._bootstrap>", line 1051, in _cache_bytecode
  File "<frozen importlib._bootstrap>", line 1065, in set_data
OSError: [Errno 30] Read-only file system: '/usr/local/opt/libreoffice4.0/program/../program/python-core-3.3.0/lib/encodings/__pycache__'

I symlinked /opt to /usr/local/opt, and for many reasons (including faster boot, storing /usr on an SSD) I mount /usr in read-only mode by default, and use the following snippet in /etc/apt/apt.conf.d/12remount to do the magic upon system upgrade and software installs.

DPkg
{
    Pre-Invoke {"mount -o remount,rw /usr && mount -o remount,exec /var && mount -o remount,exec /tmp";};
    Post-Invoke {"mount -o remount,ro /usr ; mount -o remount,noexec /var && mount -o remount,noexec /tmp";};
}

It seems that LibreOffice 4.0 tries to put compiled Python objects into a persistent cache, and since it resides on a read-only filesystem, it cannot even create the __pycache__ directories needed for that. My workaround is the following shell script that needs to be ran just once, and works quite well by letting LibreOffice put its cached pyc files into /tmp.

#!/bin/sh
mount /usr -o rw,remount
find /opt/libreoffice4.0/program/python-core-3.3.0/lib -type d \
    -exec ln -s /tmp {}/__pycache__ \;
mount /usr -o ro,remount

Four free software I started using in 2012

2013-02-02

At the end of 2012, I realized that two of the software I started using in that year started with the letter 'm', and later, I remembered two other as well, so here's this post to document what I used in 2013.

mcabber (console XMPP a.k.a. Jabber client with built-in OTR support)

In the last ten years, I always preferred IRC to XMPP/MSN Messenger/Skype since although all of them has both the option to one-to-one and many-to-many chat, latter is the common use-case for IRC while former is with all the others. That's when Stefan showed me OTR (Off-the-Record) messaging, which provided strong autentication and encryption along with deniability afterwards. We started experimenting with version 1 on IRC using irssi-otr, but found it to be quite unstable, and another big problem was that I prefer to run irssi on a remote server, which defies the whole purpose of the end-to-end security OTR aims to provide.

So I decided to give it a try with XMPP, especially since H.A.C.K. has its own server – with registration available to anyone – at xmpp.hsbp.org. Stefan recommended me mcabber as a client, and although it has its limitations (for example, it cannot connect to multiple servers and I had to use Pidgin for registration), I found it perfect for my use-cases, as it has built-in support for OTR up to version 2, and has a nice console UI.

mcabber in action

minidlna (lightweight DLNA/UPnP media server)

I didn't know what DLNA was before I got my hands on a device that actually supported it, then I started using Serviio, but it had its limitations. It required Java, updated the local repository really slow, had an awful and complicated GUI – and had I mentioned it ran on Java? After a week, I started looking for alternatives, I naïvely typed apt-cache search dlna and that's how I met found minidlna, which was quite the opposite of Serviio.

It consisted of a single native executable, a config file and some docs, and since it's targeted at embedded systems, it ran quite fast on my dual i3 notebook. The Debian version runs as an unprivileged user by default, and I added my user to the minidlna group, so I can just drop/link files into the /var/lib/minidlna directory, and they just become accessible for any DLNA consumer. In case of content from Bittorrent, I can even download it to a remote server, mount it with sshfs (also one of my favorite solutions), symlink it into the directory, and the TV magically plays the file from the remote server via my notebook over the home Wi-Fi, which works suprisingly well even in case of HD contents. Also, on Debian, the DLNA icon is a Debian swirl logo, so it even looks great in the TV menu. :)

minidlna in action

mosh (SSH replacement extension for roaming clients and laggy connections)

I think SSH is one of those software that demonstrate the power of “the Unix way” the best. I use it for lots of purposes, but at the same time, I've found it really hard to use in case of laggy connections. I cannot even decide, which one I hate better, both cellular data connections (GPRS, EDGE, 3G, etc.) and suboptimal Wi-Fi networks can make me want to smash the keyboard. After using mosh while uploading huge videos over a consumer-grade asymmetric uplink, I also found that networks without QoS can also make the interactive SSH experience turn into a text-based RPG.

I installed mosh on the two boxes I most regularly log into via SSH, and found it really useful, especially since Daniel Drown patched mosh support into ConnectBot, an Android terminal emulator and SSH client, which makes sense, since handheld devices have the most chance to be connected to networks matching the description above. Although some say it breaks interactive applications like VIM, I had no problems with version 1.2.3 I downloaded and compiled almost two months ago, so if you also find yourself connected to laggy networks, give it a try!

mosh in action on Android

mutt (the mail user agent that sucks less)

I've been a KMail user since around 2007 and although I saw many of my friends using mutt with server-side magic, I used it just like my window manager and my shell – a tool, which I used until it worked without a hassle. When it misbehaved or crashed (it did so quite a few times), I sent bugreports, partly to make myself feel better, partly to evade “and have you reported it” questions, but I also hoped that they'll fix these properly. Then one day, during an IMAP mass move operation, KMail crashed, and did so even after restart. I've had quite an experience in bruteforcing KMail into a working state from the past, but when I couldn't change the situation in half an hour, I decided that it's time to change.

I had three mailboxes on two IMAPS servers with two distinct SMTPSA MTAs to send mails through, and I also used client-side filtering extensively. I migrated latter functionality to procmail on one of the servers, and as of February 2013, I use a transitional setup with on-line IMAP mailboxes and a local header cache. In the near future, I plan to migrate online IMAP access to a solution based on offlineimap and run a local MTA that forwards mail to the appropriate SMTP server, preferably through a tunnel/VPN to avoid password authentication and my endpoint IP address appearing in the MIME envelope.

I only had one problem so far, it seems that the online IMAP functionality is not so well-tested in mutt, so even though I use Debian testing, it crashed in around 30% of the cases when changing IMAP directories, but I managed to solve it by compiling Mutt from source, including the folder sidebar patch. Here's how it looks with the current config, displaying the Python SOAP mailing list.

mosh in action on Android


FFmpeg recipes for workshop videos

2013-01-23

In November 2012, I started doing Arduino workshops in H.A.C.K. and after I announced it on some local channels, some people asked if it could be recorded and published. At first, it seemed that recording video would require the least effort to publish what we've done, and while I though otherwise after the first one, now we have a collection of simple and robust tools and snippets that glue them together that can be reused for all future workshops.

The recording part was simple, I won't write about it outside this paragraph, but although the following thoughts might seem trivial, important things cannot be repeated enough times. Although the built-in microphones are great for lots of purposes, unless you're sitting in a silent room (no noise from machines nor people) or you already use a microphone with an amplifier, a microphone closer to the speaker should be used. We already got a cheap lavalier microphone with a preamplifier and 5 meters of cable, so we used that. It also helps if the camera operator has a headphone, so the volume level can be checked, and you won't freak out after importing the video to the PC that either the level is so low that it has lots of noise or it's so high that it becomes distorted.

I used a DV camera, so running dvgrab resulted in dvgrab-*.dv files. Although the automatic splitting is sometimes desireable (not just because of crippled file systems, but it makes it possible to transfer each file after it's closed, lowering the amount of drive space needed), if not, it can be disabled by setting the split size to zero using -size 0. It's also handy to enable automatic splitting upon new recordings with -autosplit. Finally, -timestamp gives meaningful names to the files by using the metadata recorded on the tape, including the exact date and time.

The camera I used had a stereo microphone and a matching stereo connector, but the microphone was mono, with a connector that shorted the right channel and the ground of the input jack, the audio track had a left channel carrying the sound, and a right one with total silence. My problem was that most software handled channel reduction by calculating an average, so the amplitude of the resulting mono track was half of the original. Fortunately, I found that ffmpeg is capable of powerful audio panning, so the following parameter takes a stereo audio track, discards the right channel, and uses the left audio channel as a mono output.

-filter_complex "pan=1:c0=c0"

I also wanted to have a little watermark in the corner to inform viewers about the web page of our hackerspace, so I created an image with matching resolution in GIMP, wrote the domain name in the corner, and made it semi-transparent. I used this method with Mencoder too, but FFmpeg can handle PNGs with 8-bit alpha channels out-of-the-box. The following, combined command line adds the watermark, fixes the audio track, and encodes the output using H.264 into an MKV container.

$ ffmpeg -i input.dv -i watermark.png -filter_complex "pan=1:c0=c0" \
    -filter_complex 'overlay' -vcodec libx264 output.mkv

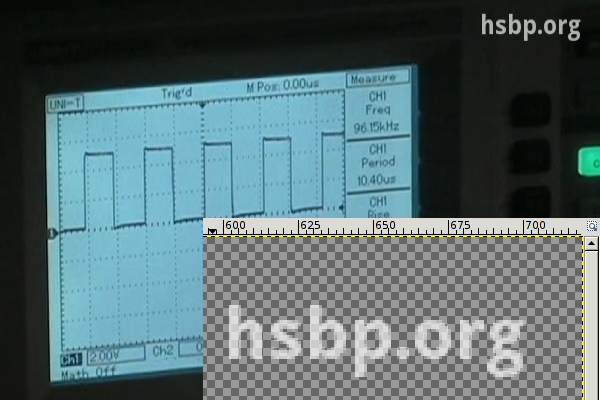
A cropped sample frame of the output can be seen below, with the zoomed watermark opened in GIMP in the corner.

hsbp.org watermark

I chose MKV (Matroska) because of the great tools provided by MKVToolNix (packaged under the same name in lowercase for Debian and Ubuntu) that make it possible to merge files later in a safe way. Merging was needed in my case for two reasons.

  • If I had to work with split .dv files, I converted them to .mkv files one by one, and merged them in the end.
  • I wanted to add a title to the beginning, which also required a merge with the recorded material.

I tried putting the title screen together from scratch, but I found it much easier to take the first 8 seconds of an already done MKV using mkvmerge, then placed a fully opaque title image of matching size using the overlay I wrote about above, and finally replace the sound with silence. In terms of shell commands, it's like the following.

ffmpeg -i input.mkv -i title.png -filter_complex 'overlay' -an \
    -vcodec libx264 title-img.mkv
mkvmerge -o title-img-8s.mkv --split timecodes:00:00:08 title-img.mkv
rm -f title-img-8s-002.mkv
ffmpeg -i title-img-8s-001.mkv -f lavfi -i "aevalsrc=0::s=48000" \
    -shortest -c:v copy title.mkv
rm -f title-img-8s-001.mkv

The first FFmpeg invocation disables audio using the -an switch, and produces title-img.mkv that contains our PNG image in the video track, and has no audio. Then mkvmerge splits it into two files, an 8 seconds long title-img-8s-001.mkv, and the rest as title-img-8s-002.mkv. Latter gets discarded right away, and a second FFmpeg invocation adds an audio track containing nothing but silence with a frequency (48 kHz) matching that of the recording. The -c:v copy parameter ensures that no video recompression is done, and -shortest discourages FFmpeg from trying to read as long as at least one input has data, since aevalsrc would generate silence forever.

Finally, the title(s) and recording(s) can be joined together by using mkvmerge for the purpose its name suggest at last. If you're lucky, the command line is as simple as the following:

$ mkvmerge -o workshop.mkv title.mkv + rec1.mkv + rec2.mkv

If you produced your input files using the methods described above, if it displays an error message, it's almost certainly the following (since all resolution/codec/etc. parameters should match, right?).

No append mapping was given for the file no. 1 ('rec1.mkv'). A default
mapping of 1:0:0:0,1:1:0:1 will be used instead. Please keep that in mind
if mkvmerge aborts with an error message regarding invalid '--append-to'
options.
Error: The track number 0 from the file 'dvgrab-001.mkv' cannot be
appended to the track number 0 from the file 'title.mkv'. The formats do
not match.

As the error message suggests, the order of the tracks can differ between MKV files, so an explicit mapping must be provided to mkvmerge for matching the tracks befor concatenation. The mapping for the most common case (a single audio and a single video track) is the following.

$ mkvmerge -o workshop.mkv t.mkv --append-to '1:0:0:1,1:1:0:0' + r1.mkv

I've had a pretty good experience with H.264-encoded MKV files, the size stayed reasonable, and most players had no problem with it. It also supports subtitles, and since YouTube and other video sharing sites accept it as well, with these tips, I hope it gets used more in recording and publishing workshops.


Complementing Python GPGME with M2Crypto

2012-12-31

While the GPGME Python bindings provide interface to most of the functionality provided by GnuPG, so I could generate keys and perform encryption and decryption using them, I found that it wasn't possible to list, which public keys can decrypt a PGP encrypted file. Of course, it's always a possibility to invoke the gpg binary, but I wanted to avoid spawning processes if possible.

As Heikki Toivonen mentioned in a Stack Overflow thread, the M2Crypto library had a PGP module, and based on a demo code, it seemed to be able to parse OpenPGP files into meaningful structures, including pke_packet that contains an attribute called keyid. I installed the module from the Debian package python-m2crypto, tried calling the PGP parser functionality, and found that

  • the keyid attribute is called _keyid now, and
  • after returning the pke_packet instances, it raises an XXXError in case of OpenPGP output generated by GnuPG 1.4.12.

It's also important to note that the M2Crypto keyid is an 8 bytes long raw byte string, while GPGME uses 16 characters long uppercase hex strings for the same purpose. I chose to convert the former to the latter format, resulting in a set of hexadecimal key IDs. Later, I could check, which keys available in the current keyring are able to decrypt the file. The get_acl function thus returns a dict mapping e-mail addresses to a boolean value that indicates the key's ability to decrypt the file specified in the filename parameter.

from M2Crypto import PGP
from contextlib import closing
from binascii import hexlify
import gpgme

def get_acl(filename):
    with file(filename, 'rb') as stream:
        with closing(PGP.packet_stream(stream)) as ps:
            own_pk = set(packet_stream2hexkeys(ps))
    return dict(
            (k.uids[0].email, any(s.keyid in own_pk for s in k.subkeys))
            for k in gpgme.Context().keylist())

def packet_stream2hexkeys(ps):
    try:
        while True:
            pkt = ps.read()
            if pkt is None:
                break
            elif pkt and isinstance(pkt, PGP.pke_packet):
                yield hexlify(pkt._keyid).upper()
    except:
        pass

Using MS Word templates with LaTeX quickly

2012-09-12

After a successful penetration test, I wanted to publish a detailed writeup about it, but the template we use at the company that includes a logo and some text in the footer was created using Microsoft Word, and I prefer using LaTeX for typesetting. It would have been possible to recreate the template from scratch, but I preferred to do it quick and, as it turned out, not so dirty.

First, I saved a document written using the template from Word to PDF, opened it up in Inkscape and removed the body (e.g. everything except the header and the footer). Depending on the internals of the PDF saving mechanism, it might be necessary to use ungroup one or more times to avoid removing more than needed. After this simple editing, I saved the result as another PDF, called s2bg.pdf.

Next, I created a file named s2.sty with the following lines.

\ProvidesPackage{s2}

\RequirePackage[top=4cm, bottom=2.8cm, left=2.5cm, right=2.5cm]{geometry}
\RequirePackage{wallpaper}
\CenterWallPaper{1}{s2bg.pdf}

The first line sets the package name, while the next three adjust the margins (which I calculated by using the ones set in Word and some trial and error) and put the PDF saved in Inkscape to the background of every page. The wallpaper package is available in the texlive-latex-extra package on Debian systems.

As our company uses a specific shade of orange as a primary color, I also changed the \section command to use this color for section headings.

\RequirePackage{color}
\definecolor{s2col}{RGB}{240, 56, 31}

\makeatletter
\renewcommand{\section}{\@startsection{section}{1}{0mm}
{\baselineskip}%
{\baselineskip}{\normalfont\Large\sffamily\bfseries\color{s2col}}}%
\makeatother

Creating a package comes with the advantage, that only a single line needs to be added to a document to use all the formatting described above, just like with CSS. The following two documents only differ such that the one on the right has an extra \usepackage{s2} line in the header.

Same document without and with style package

Two documents published with this technique (although written in Hungarian) can be downloaded: the aforementioned writeup about client-side attacks and another one about things we did in 2011.


Installing CAcert on Android without root

2012-08-16

I've been using CAcert for securing some of my services with TLS/SSL, and when I got my Android phone I chose K-9 mail over the stock e-mail client because as the certificate installation page on the official CAcert site stated, it required root access to access the system certificate store. Now, one year and two upgrades (ICS, JB) later, I revisited the issue.

As of this writing, the CAcert site contains another method that also requires root access, but as Jethro Carr wrote in his blog, since at least ICS, it's possible to install certificates without any witchcraft, using not only PKCS12 but also PEM files. Since Debian ships the CAcert bundle, I used that file, but it's also possible to download the files from the official CAcert root certificate download page. Since I have Android SDK installed, I used adb (Android Debug Bridge) to copy the certificate to the SD card, but any other method (browser, FTP, e-mail, etc.) works too.

$ adb push /usr/share/ca-certificates/cacert.org/cacert.org.crt /sdcard/
2 KB/s (5179 bytes in 1.748s)

On the phone, I opened Settings > Security, scrolled to the bottom, and selected Install from storage. It prompted for a name of the certificate, and installed the certificate in a second without any further questions asked.

Installing the CAcert root certificate on Android

After this, the certificate can be viewed and by opening Trusted credentials and selecting the User tab, and browsing an HTTPS site with a CAcert-signed certificate becomes just as painless and secure as with any other built-in CA.

Using CAcert root certificate on Android


Mounting Sympa shared directories with FUSE

2012-03-29

The database laboratory course at the Budapest University of Technology and Economics which I collaborate with as a lecturer uses Sympa for mailing lists and file sharing. Latter is not one of the most used features of this software, and the web interface feels sluggish, not to mention the lots of leftover files in my Downloads directory for each attempt to view one page of a certain file. I understood that using the same software for these two tasks made managing user accounts easier, so I tried to come up with a solution that makes it easier to handle these files with the existing setup.

First, I searched whether an API for Sympa exists and I found that while they created the Sympa SOAP server, it only handles common use-cases related to mailing lists management, so it can be considered a dead end. This meant that my solution had to use the web interface, so I selected an old and a new tool for the task: LXML for parsing, since I already knew of its power, and requests for handling HTTP, because of its fame. These two tools made it possible to create half of the solution first, resulting in a Sympa API that can be used independently of the file system bridge.

Two things I found particularly great about requests were that its handling of sessions was superior than any APIs I've ever seen, and that it was possible to retrieve the results in multiple formats (raw socket, bytes, Unicode text). Since I only had one Sympa installation to test with, I only hacked the code so far to make it work, so for example, I had to use regular expressions to strip the XML and HTML encoding information, since both stated us-ascii while the output was in ISO-8859-2, correctly stated in the HTTP Content-type header.

In the second half of the time, I had to create a bridge between the file system and the API I created, and FUSE was my natural choice. Choosing the Python binding was not so easy, as a Debian user, the python-fuse package seemed like a logical choice, but as Matt Joiner wrote in his answer on a related Stack Overflow question, fusepy was a better choice. Using one of the examples, I managed to build an experimental version of SympaFS with naive caching and session management, but it works!

$ mkdir /tmp/sympa
$ python sympafs.py https://foo.tld/lists foo@bar.tld adatlabor /tmp/sympa
Password:
$ mount | fgrep sympa
SympaFS on /tmp/sympa type fuse (rw,nosuid,nodev,relatime,user_id=1000,
group_id=1000)
$ ls -l /tmp/sympa/2012
összesen 0
-r-xr-xr-x 1 root root  11776 febr   9 00:00 CensoredFile1.doc
-r-xr-xr-x 1 root root 161792 febr  22 00:00 CensoredFile2.xls
-r-xr-xr-x 1 root root  39424 febr   9 00:00 CensoredFile3.doc
dr-xr-xr-x 2 root root      0 febr  14 00:00 CensoredDir1
dr-xr-xr-x 2 root root      0 ápr    4  2011 CensoredDir2
$ file /tmp/sympa/2012/CensoredFile1.doc
Composite Document File V2 Document, Little Endian, Os: Windows, Version
5.1, Code page: 1252, Author: Censored, Last Saved By: User, Name of
Creating Application: Microsoft Excel, Last Printed: Tue Feb 14 15:00:39
2012, Create Time/Date: Wed Feb  8 21:51:10 2012, Last Saved Time/Date:
Wed Feb 22 08:10:20 2012, Security: 0
$ fusermount -u /tmp/sympa

Tracking history of docx files with Git

2012-03-27

Just as with PHP, OOXML, and specifically, docx is not my favorite format, but when I use it, I prefer tracking the history using my preferred SCM of choice, Git. What makes it perfect to track documents is not only the fact that setting up a repository takes one command and a few miliseconds, but its ability to use an external program to transform artifacts (files) to text before displaying differences, which results in meaningful diffs.

The process of setting up an environment like this is described best in Chapter 7.2 of Pro Git. The solution I found best to convert docx files to plain text was docx2txt, especially since it's available as a Debian package in the official repositories, so it takes only an apt-get install docx2txt to have it installed on a Debian/Ubuntu box.

The only problem was that Git executes the text conversion program with the name of the input file given as the first and only argument, and docx2txt (in contrast with catdoc or antiword, which uses the standard output) saves the text content of foo.docx in foo.txt. Because of this, I needed to create a wrapper in the form of the following small shell script.

#!/bin/sh
docx2txt <$1

That being done, the only thing left to do is configuring Git to use this wrapper for docx files by issuing the following commands in the root of the repository.

$ git config diff.docx.textconv /path/to/wrapper.sh
$ echo "*.docx diff=docx" >>.git/info/attributes

End-to-end secure REST service using CakePHP

2012-03-14

While PHP is not my favorite language and platform of choice, I have to admit its ease of deployment, and that's one of the reasons I've used it to build some of my web-related projects, including the REST API and the PNG output of HackSense, and even the homepage of my company. Some of these also used CakePHP, which tries to provide the flexibility and “frameworkyness” of Ruby on Rails while keeping it easy to deploy. It also has the capability of simple and rapid REST API development, which I often prefer to the bloatedness of SOAP.

One of the standardized non-functional services of SOAP is WS-Security, and while it's great for authentication and end-to-end signed messages, its encryption scheme not only has a big overhead, but it had been cracked in 2011, thus cannot be considered secure. That being said, I wanted a solution that can be applied to a REST API, does not waste resources (e.g. spawning OS processes per HTTP call), and uses as many existing code as feasible.

The solution I came up with is a new layout for CakePHP that uses the GnuPG module of PHP, which in turn uses the native GnuPG library. This also means, that the keyring of the user running the web server has to be used. Also, Debian (and thus Ubuntu) doesn't ship this module as a package, so it needs to be compiled, but it's no big deal. Here's what I did:

# apt-get install libgpgme11-dev php5-dev
# wget http://pecl.php.net/get/gnupg-1.3.2.tgz
# tar -xvzf gnupg-1.3.2.tgz
# phpize && ./configure && make && make install
# echo "extension=gnupg.so" >/etc/php5/conf.d/gnupg.ini
# /etc/init.d/apache2 reload

These versions made sense in February 2012, so make sure that libgpgme, PHP and the PHP GnuPG module refers to the latest version available. After the last command has executed successfully, PHP scripts should be able to make use of the GnuPG package. I crafted the following layout in views/layouts/gpg.ctp:

<?php

$gpg = new gnupg();
$gpg->addencryptkey(Configure::read('Gpg.enckey'));
$gpg->addsignkey(Configure::read('Gpg.sigkey'));
$gpg->setarmor(0);
$out = $gpg->encryptsign($content_for_layout);
header('Content-Length: ' . strlen($out));
header('Content-Type: application/octet-stream');
print $out;

?>

By using Configure::read($key), the keys used for making signatures and encryption can be stored away from the code, I put the following two lines in config/core.php:

Configure::write('Gpg.enckey', 'ID of the recipient's public key');
Configure::write('Gpg.sigkey', 'Fingerprint of the signing key');

And at last, actions that require this security layer only need a single line in the controller code (e.g. controllers/foo_controller.php):

$this->layout = 'gpg';

Make sure to set this as close to the beginning of the function as you can to avoid leaking error messages to attackers triggering errors in the code before the layout is set to the secured one.

And that's it, the layout makes sure that all information sent from the view is protected both from interception and modification. During testing, I favored using armored output, I only disabled it after moving it to production, so if it's needed, only two lines need modification: setarmor(0) should be setarmor(1) and the Content-Type should be set to text/plain. Have fun!


Proxmark3 vs. udev

2012-01-06

In the summer, I successfully made my Proxmark3 work by working around every symptom of bit rot that made it impossible to run in a recent environment. One bit that survived the aforementioned effect was the single udev entry that solved the controversy of the principle of least privilege and the need of raw USB access. As the official HOWTO mentioned, putting the following line into the udev configuration (/etc/udev/rules.d/026-proxmark.rules on Debian) ensured that the Proxmark3 USB device node will be accessible by any user in the dnet group.

SYSFS{idVendor}=="9ac4", SYSFS{idProduct}=="4b8f", MODE="0660", GROUP="dnet"

However, the SYSFS{} notation became obsolete in newer udev releases, and at first, I followed the instincts of a real programmer by disregarding a mere warning. But with a recent udev upgrade, complete removal of support for the obsolete notation came, so I had to face messages like the following on every boot.

unknown key 'SYSFS{idVendor}' in /etc/udev/rules.d/026-proxmark.rules:1
invalid rule '/etc/udev/rules.d/026-proxmark.rules:1'

The solution is detailed on many websites, including the blogpost of jpichon, who also met the issue in a Debian vs. custom hardware situation. The line in the udev configuration has to be changed to something like the following.

SUBSYSTEM=="usb", ATTR{idVendor}=="9ac4", ATTR{idProduct}=="4b8f", MODE="0660", GROUP="dnet"

Grsecurity missing GCC plugin

2011-07-01

The problem:

$ make -j4
scripts/kconfig/conf --silentoldconfig Kconfig
warning: (VIDEO_CX231XX_DVB) selects DVB_MB86A20S which has unmet direct dependencies (MEDIA_SUPPORT && DVB_CAPTURE_DRIVERS && DVB_CORE && I2C)
  HOSTCC  -fPIC tools/gcc/pax_plugin.o
  tools/gcc/pax_plugin.c:19:24: fatal error: gcc-plugin.h: No such file or directory
  compilation terminated.
  make[1]: *** [tools/gcc/pax_plugin.o] Error 1
  make: *** [pax-plugin] Error 2
  make: *** Waiting for unfinished jobs....

The solution:

# apt-get install gcc-4.6-plugin-dev


CC BY-SA RSS Export
Proudly powered by Utterson