Since my FFmpeg recipes post I've been using FFmpeg to process videos recorded at H.A.C.K. talks and workshops, and I needed an easy way to inject my own code into the pixel pipeline. For such tasks, I prefer stdio since there are APIs in every sane programming language, and the OS solves all the problems regarding the producer–consumer problem including parallelization and buffer management out of the box, while making it simple to tap into streams and/or replace them with files for debug purposes.
As it turned out, FFmpeg can be used both as a decoder and encoder in this regard. In case of former, the input is a video file (in my case, raw DV) and FFmpeg outputs raw RGB triplets, from left to right, then from top to bottom, advancing from frame to frame. The relevant command line switches are the following.
-pix_fmt rgb24sets the pixel format to 24-bit (3 × 8 bit) RGB-vcodec rawvideosets the video codec to raw, resulting in raw pixels-f rawvideosets the container format to raw, e.g. no wrapping-(a single dash) as the last parameter sends output to stdout
A simple example with 2 frames of 2x2 pixels:
| Frame 1 | Frame 2 | Raw output (hex dump) | ||
|---|---|---|---|---|
|
||||
The simplest way to test is redirecting the output of a video with solid
colors to hd as it can be seen below (input.mkv is the input file).
$ ffmpeg -i input.mkv -vcodec rawvideo -pix_fmt rgb24 \
    -f rawvideo - | hd | head
Such raw image data can be imported in GIMP by selecting Raw image data
in the Select File Type list in the Open dialog; since no metadata is
supplied, every consumer must know at least the width and pixel format of
the image. While GIMP is great for debugging such data, imaging libraries
can also easily read such data, for example PIL offers the Image.frombytes
method that takes the pixel format and the size as a tuple via parameters.
For example Image.frombytes('RGB', (320, 240), binary_data) returns an
Image object if binary_data contains the necessary 320 × 240 × 3 bytes
produced by FFmpeg in rgb24 mode. If you only need grayscale, 'RGB' can
be replaced with 'L' and rgb24 with gray, like we did in our editor.
FFmpeg can also be used as an encoder; in this scenario, the input consists of raw RGB triplets in the same order as described above, and the output is a video-only file. The relevant command line switches are the following.
-r 25defines the number of frames per second (should match the original)-s 320x240defines the size of a frame-f rawvideo -pix_fmt rgb24are the same as above-i -sets stdin as input
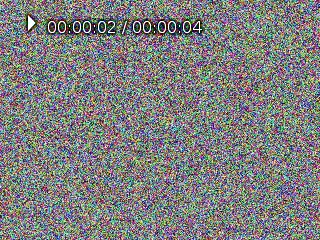
The simplest way to test is redirecting /dev/urandom which results in
white noise as it can be seen below (4 seconds in the example).
$ dd if=/dev/urandom bs=$((320 * 240 * 3)) count=100 | ffmpeg -r 25 \
    -s 320x240 -f rawvideo -pix_fmt rgb24 -i - output.mkv
Below is an example of a result played in Mplayer.
Having a working encoder and decoder pipeline makes it possible not only to generate arbitrary output (that's how we generated our intro) but also to merge slides with the video recording of the talk. In that case, pixels can be “forwarded” without modification from the output of the decoder to the input of the encoder by reading stdin to and writing stdout from the same buffer, thus creating rectangular shapes of video doesn't even require image libraries.